Key takeaways:
Research shows that yoga may lessen low back pain and muscle tension.
The best yoga poses for lower back pain should stretch and strengthen core muscles that support your spine, increasing flexibility and mobility.
Advanced postures, like arm balances and inversions, may worsen back pain and should be avoided. Talk to your healthcare provider before you try yoga for low back pain.
Low back pain is one of the leading causes of disability worldwide. Though most cases are acute or short-term, the pain can disrupt your daily life. Common causes include injuries and conditions such as muscle strain, a herniated disc, and arthritis.
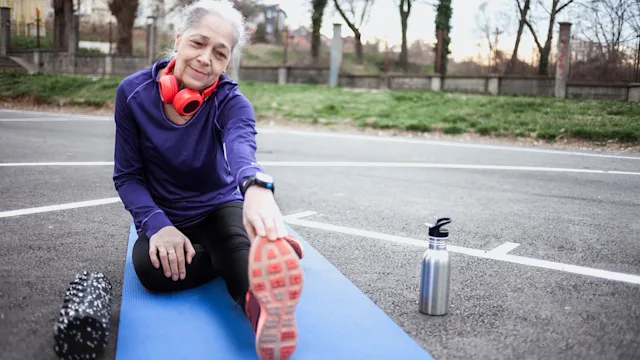
Luckily, moderate physical activity — including stretching and strengthening exercises that target core muscles — can help. A low-impact activity like yoga ticks all the boxes, whether your pain is acute or chronic. Yoga poses for lower back pain can promote body awareness and ease symptoms.
What are the best yoga poses for lower back pain?
Many scientific studies have looked at the benefits of regular yoga practice for lower back pain. And the results are largely positive. A 2020 review found that yoga was equally effective at lessening low back pain and physical limitations as traditional physical therapy.
Search and compare options
In another study, researchers looked at the effects of yoga on military veterans with low back pain. After practicing yoga twice a week for 12 weeks, they had slightly less pain and less reliance on pain medication, including opioids. The benefits of yoga don't end with pain relief. The mind-body practice may also help people with low back pain relieve related stress and anxiety.
Talk to your healthcare provider first. Beginners should also consider working with an experienced yoga teacher because the correct technique is key to preventing further injury.
The best yoga poses for lower back pain work to strengthen core muscles — including the abdominals, obliques, and lower back muscles — and stabilize the spine. Other effective poses stretch these muscles to build spinal flexibility and mobility.
Here are some options to help you get started.
Downward dog
Start on all fours with your shoulders aligned over your wrists and your hips aligned over your heels.
Tuck your toes and lift your knees off the mat, straightening your legs and sending your buttocks up toward the ceiling. Walk your feet back a few inches.
Contract your core muscles and keep your back straight and neck long.
Pull your shoulders down away from your ears and rotate your upper arms outward.
Press your heels down toward the mat, but do not worry if they don't touch the mat.
Hold the downward dog as you continue to lengthen your spine from your hips to the top of your head for 5 to 10 deep breaths.
Pigeon pose
Start in a downward dog position. Extend your right leg back, then bring it forward, bending the knee and placing it on the mat just behind your right wrist. Place the shin as close to parallel with the top of the mat as possible, but don't force it beyond your natural flexibility.
Place your fingertips on the mat slightly in front of you for support. Keep the hips squared with the top of the mat and lengthen up through your spine.
Stay here or begin to fold forward at the hip creases. Walk your fingertips forward slowly, and hold in pigeon pose for 5 to 10 slow breaths.
Return to downward dog, then switch sides.
Read more like this
Explore these related articles, suggested for readers like you.


Happy baby pose
Lie on your back with your knees bent.
Lift your feet off the mat and grasp the outside of either foot or the big toes.
Keeping your lower back pressed into the mat, open your knees outward as you pull them down toward your outer chest.
Hold the happy baby pose for 5 to 10 slow breaths.
Child's pose
Start on all fours. Bring your feet closer together and widen your knees.
Press your hips back and down, so your belly rests between your thighs.
Keep your arms extended and your elbows off the mat, or let them fall to the mat for a more relaxed child's pose.
Continue to lengthen through your spine and let your belly settle between your thighs.
Hold the position for 5 to 10 deep breaths.
Cat-cow
Begin on all fours with your shoulders aligned over your wrists and your hips aligned over your heels.
Contract your core muscles and maintain a neutral spine and long neck. Inhale as you lift your chest and drop your belly down toward the floor, lifting your hips toward the ceiling.
Exhale as you reverse the position, arching your spine like a cat and pressing up through the middle of your shoulder blades. Drop your chin toward your chest and your hips down.
Continue to alternate between cat-cow positions for several rounds.
Bridge pose
Lie on your back with your arms alongside your body, your knees bent, and your feet flat on the floor.
Contract your core muscles, draw your heels close to your buttocks, and press your feet and palms into the mat.
Inhale as you lift your hips off the floor. Roll your shoulder blades in and raise your hips until they align with your chest and knees. Bring your arms together under your back and clasp your hands if your shoulder mobility allows it.
Hold in bridge pose for a slow count of 5 to 10 seconds, then release.
Sphinx pose
Lie on the floor on your belly.
Prop yourself up on your elbows with your fingers and forearms pointing straight ahead.
Make sure your shoulders are aligned over your elbows.
Inhale as you press into your forearms, puff out your chest, and extend your upper spine and head toward the ceiling.
Breathe for a slow count of 5 to 10 seconds in sphinx pose as you continue to press your chest forward and extend your spine. Then, release the posture.
Forward fold
Stand at the top of your mat with your feet hip-distance apart.
Inhale your arms up overhead, then exhale as you fold forward at the hip points. Keep your spine long and avoid rounding your back.
Place your hands on your shins or your fingertips on the ground. Keep a slight bend in your knees if your hamstrings are less flexible.
Stay in forward fold for 5 to 10 slow, deep breaths allowing your spine and head to lengthen toward the floor.
Round up slowly vertebrae by vertebrae back to the starting position.
Reclined spinal twist
Lie on your back with your knees bent and feet flat on the floor.
Open your arms out to the side, and exhale as you allow your knees to fall across the body to the right side.
Keep both shoulder blades on the floor. Turn your head to the left, looking in the opposite direction of your knees.
Hold the reclined spinal twist for 5 to 10 deep breaths. Then, return to the center and switch sides.
What yoga poses should you avoid if you have lower back pain?
When you practice yoga with low back pain, choosing suitable poses is key. Ease into the practice and stop if any postures cause new or worsening pain. Also, avoid advanced poses, especially if you are new to yoga or are experiencing severe pain.
These include:
Arm balances, like crow pose, that take a lot of core strength
Inversions, like handstands, require strong abdominals and low-back muscles and put pressure on the spine
Advanced backbends, such as wheel pose, can put undue stress on the lower back
You'll want to change or avoid other yoga postures, including camel pose, boat pose, and shoulder stand. Remember to use props, like blocks or a chair, when you need extra support.
The bottom line
A regular yoga practice can do wonders for your physical and mental health. Research shows that carefully selected yoga poses for lower back pain can boost flexibility, strengthen muscles, and soothe pain. After you get your healthcare provider's OK, start slowly. Beginners can work with an experienced yoga teacher to avoid further stress or injury.

Why trust our experts?


References
American Council on Exercise. (n.d.). Downward-facing dog.
Barlow, R., et al. (2018). Yoga can ease that aching back. BU Today.
Cramer, H., et al. (2013). A systematic review and meta-analysis of yoga for low back pain. The Clinical Journal of Pain.
Gordon, R., et al. (2016). A systematic review of the effects of exercise and physical activity on non-specific chronic low back pain. Healthcare.
Groessl, E. J., et al. (2017). Yoga for military veterans with chronic low back pain: A randomized clinical trial. American Journal of Preventive Medicine.
Kovar, E. (2015). 9 progressed yoga hip opener postures. American Council on Exercise.
MedlinePlus. (2021). Low back pain - chronic.
Myers, M. (2019). Forward fold. Critical Instances.
New York University Student Health Services. (n.d.). Yoga sequence for mild depression.
Qaseem, A., et al. (2017). Noninvasive treatments for acute, subacute, and chronic low back pain: A clinical practice guideline from the American College of Physicians. Annals of Internal Medicine.
Senicola, C. A. (2021). Yoga cool down stretches for runners. Hospital for Special Surgery.
Tekur, P., et al. (2012). A comprehensive yoga programs improves pain, anxiety and depression in chronic low back pain patients more than exercise: An RCT. Complementary Therapies in Medicine.
University of Florida GatorCare. (2017). Bedtime yoga.
World Health Organization. (2022). Musculoskeletal health.
Zhu, F., et al. (2020). Yoga compared to non-exercise or physical therapy exercise on pain, disability, and quality of life for patients with chronic low back pain: A systematic review and meta-analysis of randomized controlled trials. PLoS One.